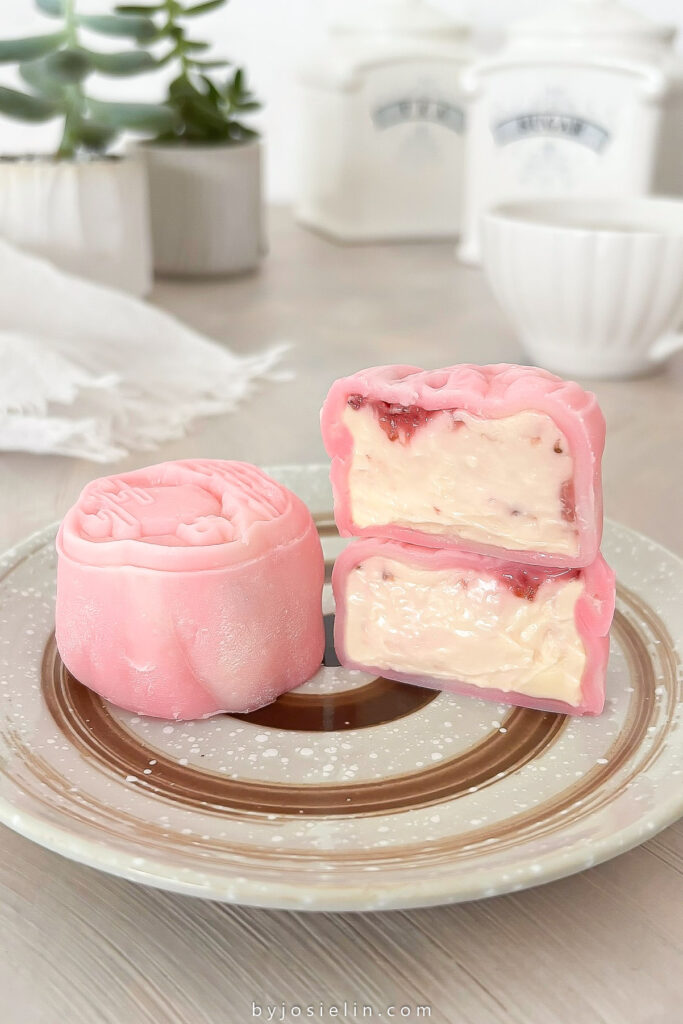
These Strawberry Cheesecake Snow Mooncakes are one of my favorite modern mooncake flavor! Chewy glutinous rice flour skin wrapped around the creamiest strawberry cheesecake filling! So much fun to make and yes, they taste as good as they look!
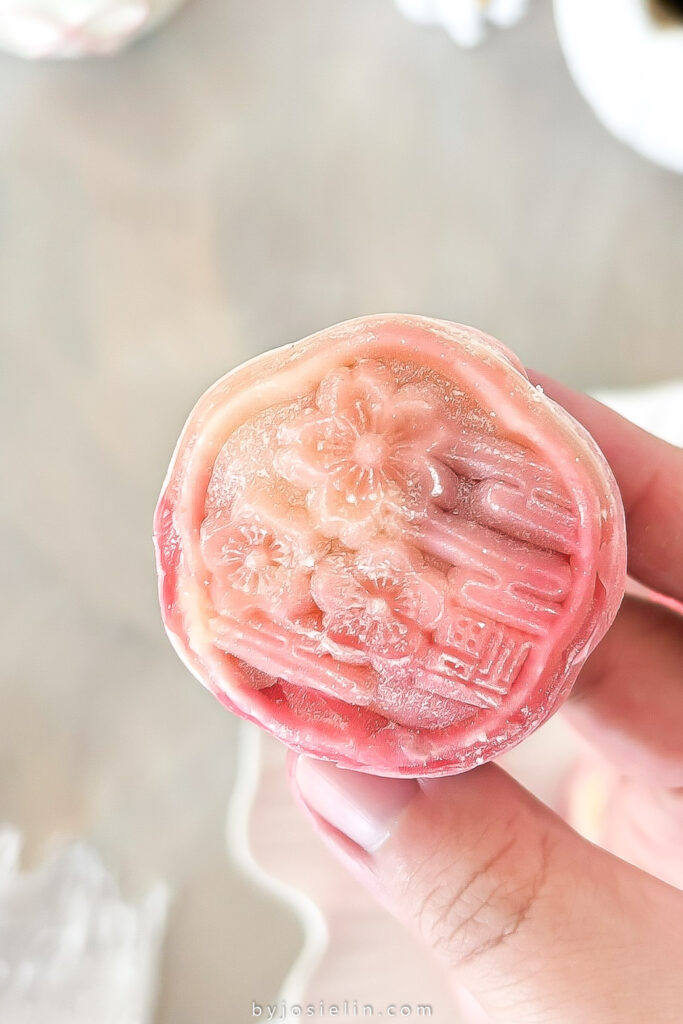
I grew up eating traditional baked mooncakes every Mid-Autumn Festival, with their golden pastry wrapped around rich lotus seed, red bean, or black sesame fillings. Those classic flavors will always have a special place in my heart, but over the past few years, I’ve completely fallen in love with snow skin mooncakes. And I finally got around to making these Strawberry Cheesecake Snow Skin Mooncakes!
The snow skin is made with glutinous rice flour, giving it a soft, chewy texture that almost melts in your mouth with every bite. And the filling? Pure creamy goodness. Made with cream cheese and strawberry jam, it’s tangy, sweet, fruity, and irresistibly smooth. It honestly tastes just like strawberry cheesecake wrapped in the softest, chewiest layer.
Since these are no-bake snow skin mooncakes served chilled, they’re incredibly refreshing, especially on warm days. The cool, chewy skin paired with the luscious strawberry cheesecake filling is such a dreamy combination. They’re the perfect twist on a traditional Mid-Autumn Festival dessert while still feeling nostalgic and comforting. One bite, and they might just become your new favorite mooncake too!
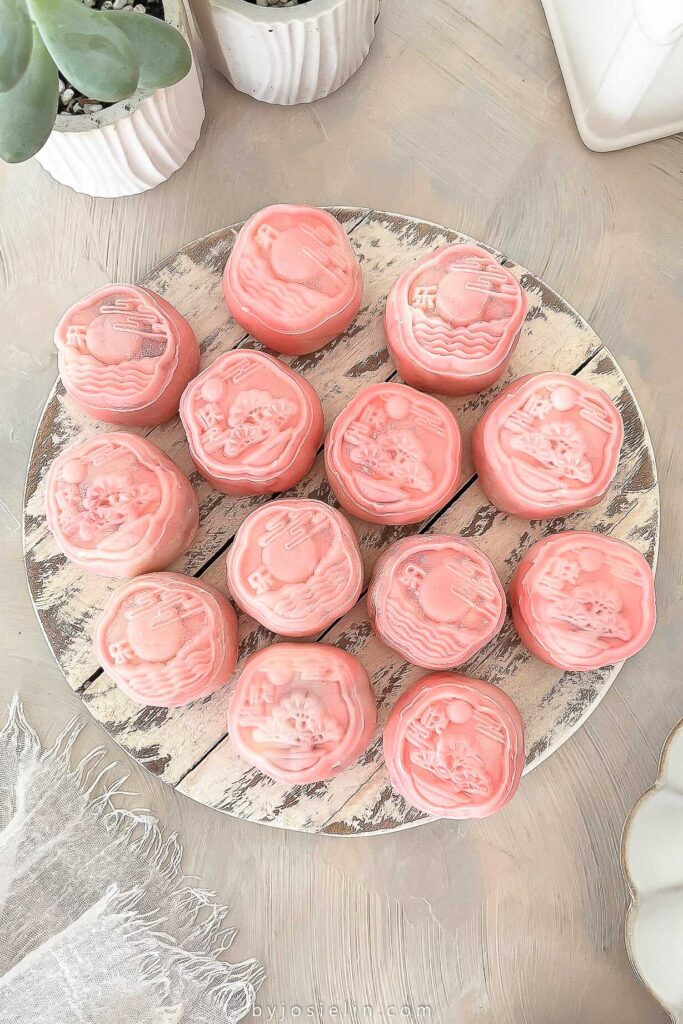
WHY YOU’LL LOVE THESE STRAWBERRY CHEESECAKE SNOW MOONCAKES
- Soft & Chewy Texture! Made with glutinous rice flour, the snow skin is soft, tender, and perfectly chewy, with a melt-in-your-mouth bite.
- These no bake snow skin mooncakes are served chilled, making them light, cool, and refreshing. The perfect dessert for summer or when you want something indulgent without feeling too heavy.
- A Fun Twist on Tradition! You still get the beauty and charm of traditional mooncake molds, but with a modern strawberry cheesecake flavor everyone will love.
- Beautiful & Bite-Sized: Pretty, colorful, and perfectly portioned, they’re as lovely to look at as they are to eat.
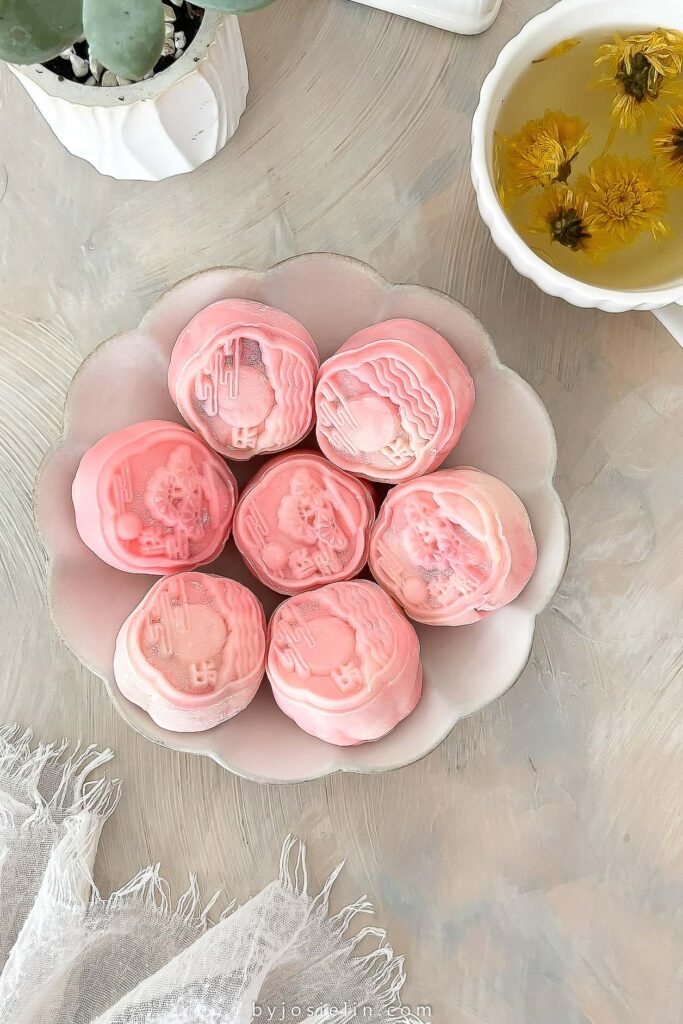
- Perfect for Sharing: Whether you’re celebrating the Mid-Autumn Festival or bringing a homemade treat to family and friends, these strawberry cheesecake snow skin mooncakes are guaranteed to impress.
INGREDIENTS NEEDED & NOTES
Rice Flour – This comes from the type of regular (long or medium-grain) rice that we eat and it is ground into fine powder. Rice flour makes a slightly chewy texture, but it also helps keep the shape and less sticky.
Glutinous Rice Flour – Keep in mind that glutinous rice flour (also known as sweet rice flour or sticky rice flour) is completely different from regular rice flour. This is made from cooked and dehydrated glutinous rice kernels that are ground into fine powder. It becomes more sticky, chewy, and firm when cooked. It has no sweet taste at all similar to regular rice flour.
Cornstarch – Snow skin mooncakes usually use wheat starch to make the mooncakes look slightly translucent but you can substitute wheat starch with cornstarch or tapioca starch. I use cornstarch to make these beauties! They’re still beautiful but they don’t look translucent.
Sugar – Powdered sugar (confectioners’ sugar) to make the snow skin and also for the cream cheese mixture. You’ll also need a lil granulated sugar to make the strawberries.
Whole Milk – Go for whole milk for the best flavor and creamy texture. You can also use coconut milk, or any plant-based.
Butter – You can use salted or unsalted butter, but unsalted butter allows you to control the salt content in the recipe. If you’re using salted butter, skip the salt.
Cream Cheese – Grab that original cream cheese, which is full-fat, not the cream cheese spread.
Vanilla Extract – A good quality vanilla extract is needed to provide a lovely background flavor.
Strawberries – It’s best to use fresh strawberries, but frozen berries also works.
Lemon – You’ll just need 1 fresh lemon to enhance the flavor. This recipe uses fresh lemon juice and fresh lemon zest.
BAKING TOOLS & EQUIPMENT YOU’LL NEED
- Mooncake mold. I use a 2 inch (50g) plastic mooncake mold.
- Steamer
- Medium pan
- Mixing bowls
- Fine Mesh Sieve
- a whisk
- Rubber spatula
- Food grade plastic gloves
- Kitchen scale
- Parchment paper
STEP-BY-STEP INSTRUCTIONS TO MAKE THESE STRAWBERRY CHEESECAKE SNOW MOONCAKES
(Be sure to check the printable recipe card below)
Strawberry Jam:
160g (1 heaping cup) diced strawberries
2 tablespoons granulated sugar
1 tablespoon fresh lemon juice
1/2 teaspoon fresh lemon zest
1/8 teaspoons cornstarch
Cream Cheese:
340g (12 oz) original cream cheese, room temperature
60g (1/2 cup) powdered sugar
Strawberry jam
Snow Skin:
80g (2/3 cup) glutinous rice flour
30g (1/4 cup) rice flour
30g (1/4 cup) cornstarch
60g (1/2 cup) powdered sugar
a little pinch of salt
180g (3/4 cup) whole milk
2 tablespoons neutral oil
1/2 teaspoon vanilla extract
1 tablespoon unsalted butter
STEP 1 – Make the Strawberry Cheesecake Filling
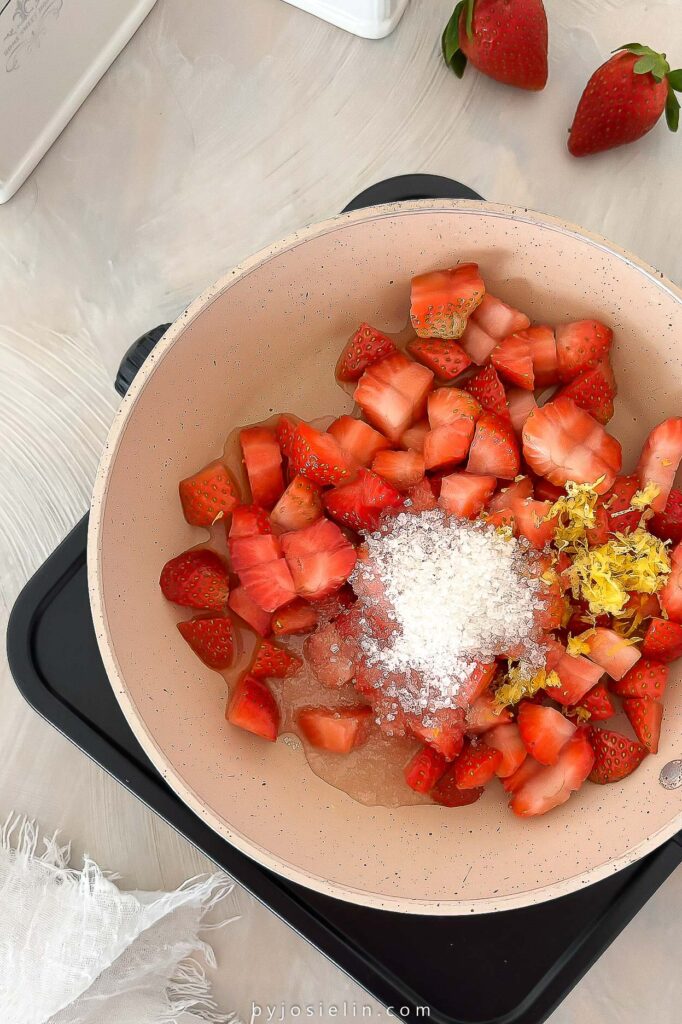
In a small saucepan, combine the diced strawberries, granulated sugar, lemon juice, lemon zest, and cornstarch. Cook over medium-low heat, stirring frequently, until the strawberries soften and the mixture thickens, about 4–5 minutes. Transfer to a bowl and let it cool completely.
In a medium mixing bowl, beat the room-temperature cream cheese and powdered sugar with an electric mixer until smooth and creamy.
Drain off any excess juice from the cooled strawberry mixture, then gently fold the strawberries into the cream cheese using a rubber spatula until evenly combined. Cover the bowl with plastic wrap and refrigerate for at least 2 hours, or until the filling is firm enough to scoop and shape.
STEP 2 – Make the Snow Skin
Fill your steamer with enough water and bring it to a boil over medium heat. Once boiling, place the empty steamer over the water and let it preheat for about 15 minutes.
Meanwhile, in a medium mixing bowl, whisk together the glutinous rice flour, rice flour, cornstarch, powdered sugar, and salt.
In a large measuring cup or separate bowl, whisk together the whole milk, neutral oil, and vanilla extract until well combined.
Gradually pour the wet ingredients into the dry ingredients, whisking continuously until you have a smooth, lump-free batter. For an extra silky dough, strain the batter through a fine-mesh sieve into a heatproof bowl that fits inside your steamer.
Place the bowl in the preheated steamer, cover the bowl with a plate, and steam over medium-high heat for 15–20 minutes, or until the dough is fully cooked.
You’ll know it’s ready when a butter knife inserted into the center comes out clean and the dough feels firm.
Carefully remove the bowl from the steamer, then add the butter and let the residual heat melt it completely.
Once it’s cool enough to handle, put on a pair of food safe gloves and knead the dough until smooth, soft, and stretchy.
Finally, shape the dough into a ball, wrap it tightly in plastic wrap, and let it cool completely.
STEP 3 – Assemble the Mooncakes
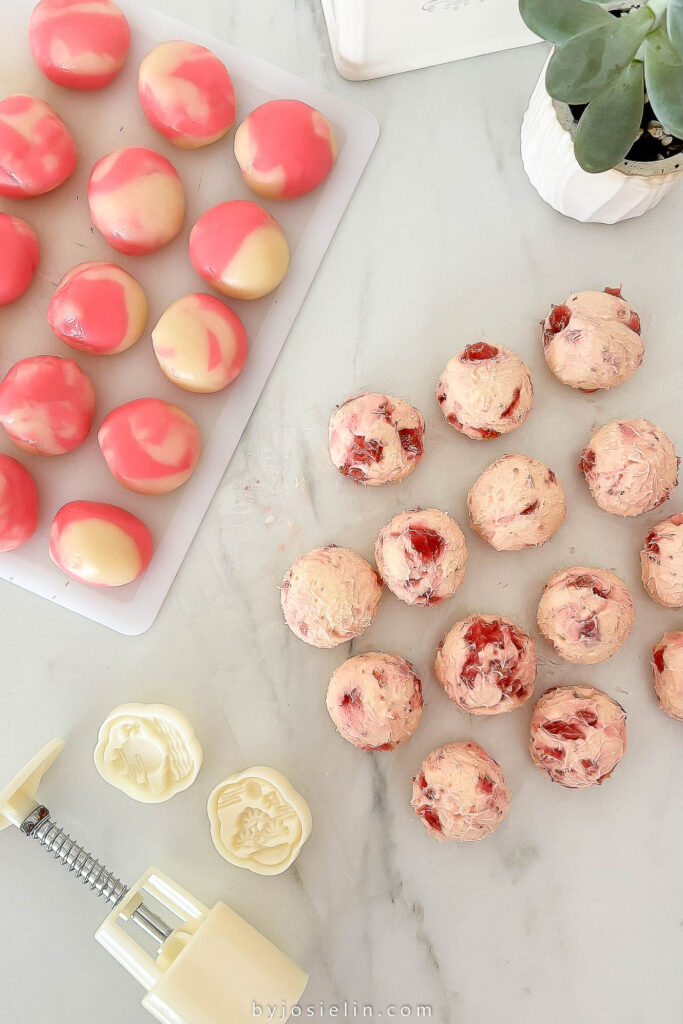
For a 50g (about 2-inch) plastic mooncake mold, I like to use a 1:1 ratio of snow skin to filling, so each mooncake is made with 25g snow skin and 25g strawberry cheesecake filling.
Once the strawberry cheesecake filling is fully chilled and firm, divide it into 25g portions (you should get about 16). Roll each portion into a smooth ball, cover, and refrigerate until you’re ready to assemble.
If you’re making a marbled design, divide the cooled snow skin dough into two equal portions and knead your desired gel food coloring into one of them. Roll each portion into a long rope, gently twist the ropes together, then divide the twisted dough into 25g portions ((you should get about 16). Roll each portion into a smooth ball.
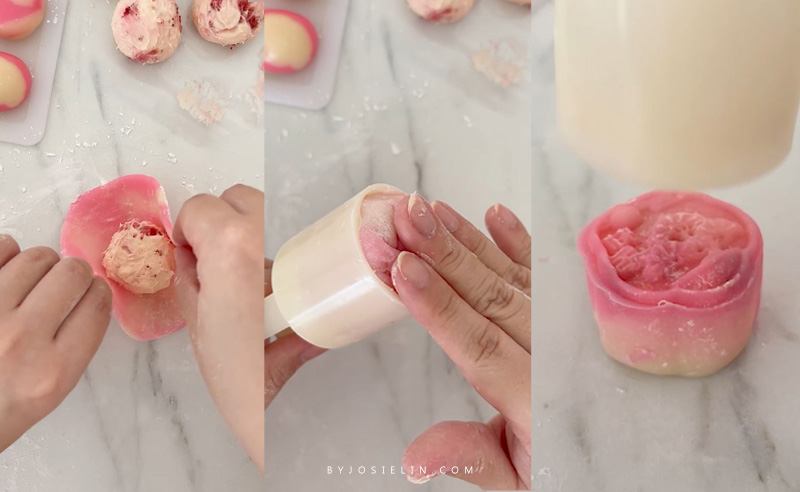
Lightly dust a ball of snow skin with cornstarch and roll it into a 3½–4-inch circle, leaving the center slightly thicker than the edges. Place a chilled strawberry cheesecake ball in the center, then gently stretch the dough up and around the filling, pinching the seams together to seal completely. Roll it gently between your palms until smooth.
Lightly dust the inside of the mooncake mold with cornstarch and tap out any excess. Place the filled dough ball into the mold and press firmly until the plunger won’t go down any further.
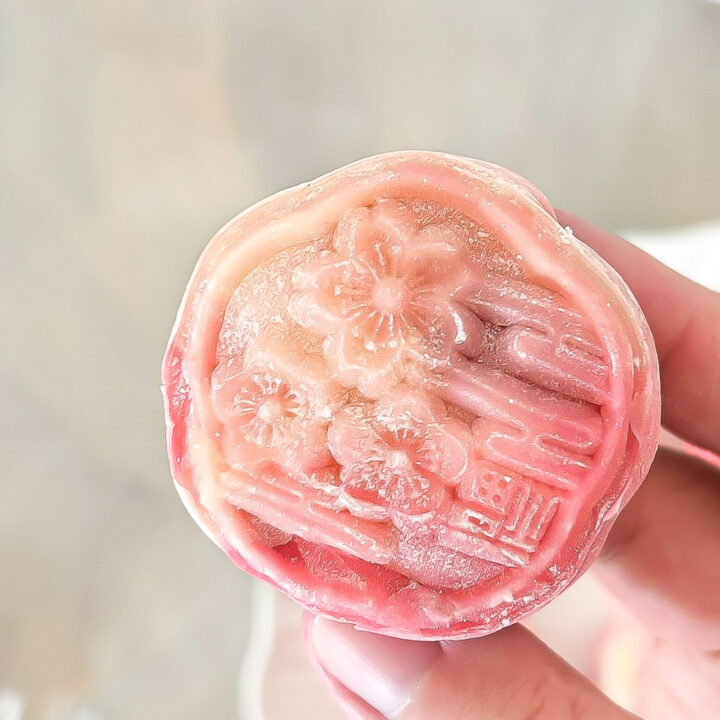
Hold for 10–15 seconds to create a well-defined pattern, then gently press the lever to release the mooncake. Repeat with the remaining dough and filling.
If the strawberry cheesecake filling becomes too soft while assembling, simply return it to the refrigerator for about 20 minutes before continuing. Keeping the filling well chilled makes the mooncakes much easier to shape and helps them hold their beautiful pattern.
Then, you can enjoy immediately or let them rest in the fridge for a few hours so the filling firms up.
TIPS FOR MAKING THE BEST STRAWBERRY CHEESECAKE SNOW MOONCAKES
- Wear food grade gloves. Snow skin dough can be quite sticky, especially while it’s still warm. Food grade plastic gloves make kneading and assembling the mooncakes much easier.
- Knead until smooth and stretchy. The dough will feel very sticky at first, but keep kneading. As the butter is incorporated, it will become smooth, elastic, and much easier to work with.
- Use a kitchen scale. For evenly sized mooncakes and the best-looking pattern, weigh both the snow skin and filling. A 1:1 ratio (25g snow skin + 25g filling) works perfectly for a 50g mooncake mold.
- A light cornstarch coating helps prevent the dough from sticking to your hands, rolling pin, and mooncake mold. Be sure to tap out any excess cornstarch from the mold before pressing.
- Keep the filling cold. If the strawberry cheesecake filling starts to soften while you’re assembling, refrigerate it for 15–20 minutes before continuing. Cold filling is much easier to wrap and helps the mooncakes hold their shape.
- Chill before serving. Refrigerate the finished mooncakes for at least 1 hour before serving. This allows the snow skin to firm up slightly and gives the strawberry cheesecake filling time to fully set, resulting in the best flavor and texture.
HERE’S HOW TO STORE THESE STRAWBERRY CHEESECAKE SNOW MOONCAKES
Store the mooncakes in an airtight container in the refrigerator for up to 6 days. Since the filling is made with cream cheese, they should always be kept chilled.
For the best flavor and texture, let the mooncakes sit at room temperature for 5–10 minutes before serving. This allows the cheesecake filling to soften slightly while the snow skin stays soft and chewy.
If stacking the mooncakes, place a piece of parchment paper between each layer to prevent them from sticking together or damaging the pattern.
I’d not recommend to freeze these mooncakes. Freezing and thawing can change the texture of both the snow skin and the cream cheese filling, making the skin less chewy and the filling watery.
Strawberry Cheesecake Snow Skin Mooncakes (草莓奶酪冰皮月饼)
These Strawberry Cheesecake Snow Skin Mooncakes are one of my favorite modern mooncake flavor! Chewy glutinous rice flour skin wrapped around the creamiest strawberry cheesecake filling! So much fun to make and yes, they taste as good as they look!
Ingredients
Strawberry Jam
- 160g (1 heaping cup) diced strawberries
- 2 tablespoons granulated sugar
- 1 tablespoon fresh lemon juice
- 1/2 teaspoon fresh lemon zest
- 1/8 teaspoons cornstarch
Strawberry Cream Cheese
- 340g (12 oz) original cream cheese, room temperature
- 60g (1/2 cup) powdered sugar
- Strawberry jam
Snow Skin
- 80g (2/3 cup) glutinous rice flour
- 30g (1/4 cup) rice flour
- 30g (1/4 cup) cornstarch
- 60g (1/2 cup) powdered sugar
- a little pinch of salt
- 180g (3/4 cup) whole milk
- 2 tablespoons neutral oil
- 1/2 teaspoon vanilla extract
- 1 tablespoon unsalted butter
Instructions
STEP 1 – Make the Strawberry Cheesecake Filling
- In a small saucepan, combine the diced strawberries, granulated sugar, lemon juice, lemon zest, and cornstarch. Cook over medium-low heat, stirring frequently, until the strawberries soften and the mixture thickens, about 4–5 minutes. Transfer to a bowl and let it cool completely.
- In a medium mixing bowl, beat the room-temperature cream cheese and powdered sugar with an electric mixer until smooth and creamy.
- Add the strawberries, then gently fold the strawberries into the cream cheese using a rubber spatula until evenly combined.
- Cover the bowl with plastic wrap and refrigerate for at least 2 hours, or until the filling is firm enough to scoop and shape.
STEP 2 – Make the Snow Skin
- Fill your steamer with enough water and bring it to a boil over medium heat. Once boiling, place the empty steamer over the water and let it preheat for about 15 minutes.
- Meanwhile, in a medium mixing bowl, whisk together the glutinous rice flour, rice flour, cornstarch, powdered sugar, and salt.
- In a large measuring cup or separate bowl, whisk together the whole milk, neutral oil, and vanilla extract until well combined.
- Gradually pour the wet ingredients into the dry ingredients, whisking continuously until you have a smooth, lump-free batter. For an extra silky dough, strain the batter through a fine-mesh sieve into a heatproof bowl that fits inside your steamer.
- Place the bowl in the preheated steamer, cover the bowl with a plate, and steam over medium-high heat for 15–20 minutes, or until the dough is fully cooked.
- You'll know it's ready when a butter knife inserted into the center comes out clean and the dough feels firm.
- Carefully remove the bowl from the steamer, then add the butter and let the residual heat melt it completely.
- Once it's cool enough to handle, put on a pair of food safe gloves and knead the dough until smooth, soft, and stretchy.
- Finally, shape the dough into a ball, wrap it tightly in plastic wrap, and let it cool completely.
STEP 3 – Assemble the Mooncakes
- For a 50g (about 2-inch) plastic mooncake mold, I like to use a 1:1 ratio of snow skin to filling, so each mooncake is made with 25g snow skin and 25g strawberry cheesecake filling.\
- Once the strawberry cheesecake filling is fully chilled and firm, divide it into 25g portions (you should get about 16). Roll each portion into a smooth ball, cover, and refrigerate until you're ready to assemble.
- If you're making a marbled design, divide the cooled snow skin dough into two equal portions and knead your desired gel food coloring into one of them.
- Roll each portion into a long rope, gently twist the ropes together, then divide the twisted dough into 25g portions ((you should get about 16). Roll each portion into a smooth ball.
- Lightly dust a ball of snow skin with cornstarch and roll it into a 3½–4-inch circle, leaving the center slightly thicker than the edges.
- Place a chilled strawberry cheesecake ball in the center, then gently stretch the dough up and around the filling, pinching the seams together to seal completely. Roll it gently between your palms until smooth.
- Lightly dust the inside of the mooncake mold with cornstarch and tap out any excess. Place the filled dough ball into the mold and press firmly until the plunger won't go down any further.
- Hold for 10–15 seconds to create a well-defined pattern, then gently press the lever to release the mooncake. Repeat with the remaining dough and filling.
- If the strawberry cheesecake filling becomes too soft while assembling, simply return it to the refrigerator for about 20 minutes before continuing.
- Keeping the filling well chilled makes the mooncakes much easier to shape and helps them hold their beautiful pattern.
- Then, you can enjoy immediately or let them rest in the fridge for a few hours so the filling firms up.
Leave a Reply