If you love fresh, creamy, and chewy desserts, you have to try these Xue Mei Niang 雪媚娘. They feature a soft and chewy snow skin wrapper filled with fluffy whipped cream and fresh fruit. Sweet, creamy, and refreshing, they’re the perfect treat for summer!
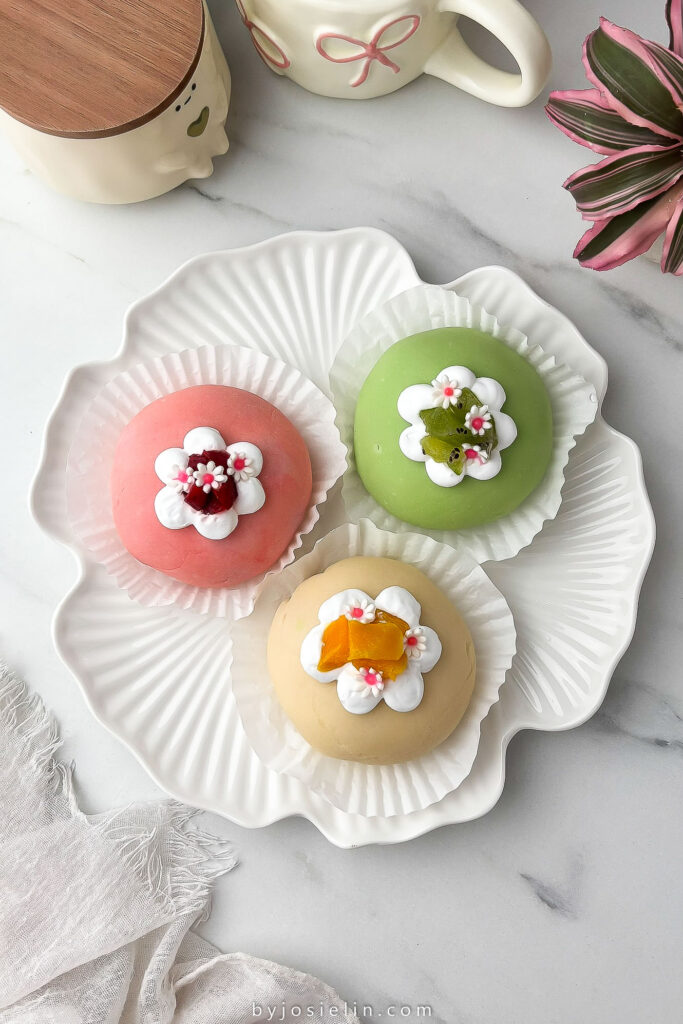
If you’ve never tried Xue Mei Niang 雪媚娘 before, you’re in for a treat!
This modern Chinese dessert is loved for its soft, chewy wrapper and light, creamy filling. It first became popular in Hong Kong during the 1970s and has since become a favorite all across main land. Today, you can find them everywhere. From bakeries and dessert shops to street food stalls.
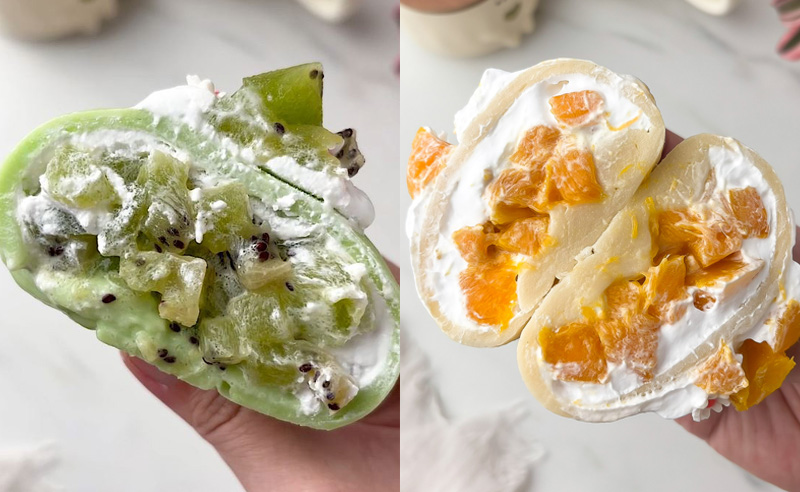
The outside is made with a soft, chewy snow skin that’s steamed instead of baked. Made from glutinous rice flour, it has a delicate, mochi-like texture that’s soft, stretchy, and incredibly satisfying to bite into. Inside, you’ll usually find fluffy whipped cream and fresh fruit, just like the ones I’m sharing in this recipe.
They’re delicious served right away when the wrapper is extra soft and pillowy, but I actually love them chilled for a couple of hours. The filling firms up slightly, making them cool, creamy, and super refreshing. Every bite is the perfect combination of chewy, creamy, and fruity. Everything you could want in a summer dessert.
You may also hear Xue Mei Niang 雪媚娘 called “snow skin mochi” in English
While the wrapper’s texture is similar to Japanese mochi, it’s not exactly the same. The ingredients and preparation are different, and the snow skin is softer, thinner, and more delicate than traditional mochi.
If they remind you of Japanese daifuku, you’re not wrong! Xue Mei Niang is inspired by daifuku, but with a modern twist that combines the chewy glutinous rice wrapper with Western-style pastry fillings like whipped cream and fresh fruit.
The biggest difference is the filling. Traditional daifuku is usually filled with sweet red bean paste, sometimes with a whole strawberry. Xue Mei Niang is filled with cream and fresh fruit (or whatever you like), that’s why they’re called modern desserts.
So, If you’re looking for a fun, no bake dessert that’s guaranteed to impress, this is definitely one to add to your list!
WHY YOU’LL LOVE THESE XUE MEI NIANG
- Soft, chewy, and irresistibly creamy. Every bite has the perfect combination of pillowy mochi, light whipped cream, and juicy fresh fruit.
- No baking required. The snow skin is simply steamed, making this an easy dessert that’s perfect for warm days when you don’t want to turn on the oven.
- Fill them with your favorite fruits, flavored whipped cream, chocolate, matcha, or even ice cream for endless variations.
- Beautiful enough for any occasion. With their smooth, delicate wrapper and colorful fruit filling, Xue Mei Niang are perfect for parties, afternoon tea, birthdays, or homemade gifts.
- Light and refreshing. Unlike heavier desserts, Xue Mei Niang feel light thanks to the fluffy whipped cream and fresh fruit, making them a perfect treat year-round.
- Make-ahead friendly. Prepare them a few hours in advance and chill until you’re ready to serve. They taste even better after resting in the refrigerator for a couple of hours.
- A guaranteed crowd pleaser. Whether it’s someone’s first time trying Xue Mei Niang or they’re already a fan, these soft, chewy treats always disappear fast
INGREDIENTS NEEDED & NOTES
Glutinous Rice Flour – This is the key ingredient for making the soft, chewy snow skin wrapper. Be sure to use glutinous rice flour, not regular rice flour, as they are not interchangeable.
Cornstarch – Traditional snow skin recipes often use wheat starch to create a slightly translucent wrapper. Since wheat starch can be difficult to find, I use cornstarch instead. The wrappers won’t be quite as translucent, but they’ll still be soft, chewy, and delicious. Tapioca starch also works as a substitute.
Powdered Sugar – Powdered sugar sweetens both the snow skin and the whipped cream filling while keeping everything smooth. You’ll also need a little granulated sugar to make the strawberry filling.
Whole Milk – Whole milk gives the snow skin a rich flavor and soft, tender texture. You can substitute it with coconut milk for a subtle coconut flavor, or use your favorite unsweetened plant-based milk if you’d like to make it dairy free.
Butter – Butter adds richness and makes the dough more pliable. I recommend using unsalted butter so you can control the salt level, but salted butter works too, just omit the additional salt in the recipe.
Heavy Cream – Use cold heavy whipping cream with at least 35% milk fat so it whips up into stable, fluffy peaks. This creates a light, creamy filling that holds its shape inside the mochi.
Vanilla Extract – A good quality vanilla extract adds warmth and enhances the flavor of the snow skin.
Salt – Just a pinch of salt balances the sweetness and enhances all of the other flavors without making the dessert taste salty.
STEP-BY-STEP INSTRUCTIONS TO MAKE THESE XUE MEI NIANG
(Be sure to check the printable recipe card below)
Snow Skin:
120g (1 cup) glutinous rice flour
30g (1/4 cup) cornstarch
60g (1/2 cup) powdered sugar
a little pinch of salt
180g (3/4 cup) whole milk
1/4 teaspoon vanilla extract
20g (1+1/2 tablespoons) unsalted butter
Gel food coloring, optional
Filling:
300g (1+1/4 cups) heavy cream, cold
2 tablespoons powdered sugar
about 2 cups fruits of your choice
STEP 1 – Make the Snow Skin
Fill your steamer with enough water and bring it to a boil over medium heat. Once it’s boiling, let the steamer preheat for about 15 minutes.
Meanwhile, in a medium bowl, whisk together the glutinous rice flour, cornstarch, powdered sugar, and salt. In a large measuring cup, combine the milk and vanilla extract.
Gradually pour the milk mixture into the flour mixture, whisking continuously until you have a smooth batter with no lumps. Then, strain the batter through a fine mesh sieve into a heatproof bowl that fits inside your steamer.
Steam over medium heat for 15 to 20 minutes, or until the dough is fully cooked. You’ll know it’s ready when a butter knife inserted into the center comes out clean and the dough feels firm.
Carefully remove the bowl from the steamer and let it cool for about 10 minutes. Then add the butter and let the residual heat melt it completely.
Once it’s cool enough to touch, put on a pair of food safe gloves and knead the dough until it’s smooth, soft, and stretchy. If you’d like to color the dough, knead in a few drops of gel food coloring at this stage.
Finally, shape the dough into a ball, wrap it tightly in plastic wrap, and let it cool completely.
Step 2 – Prepare the Filling
Wash and cut your favorite fruit into small cubes, then set aside.
In a large mixing bowl, combine the cold heavy cream and powdered sugar. Using an electric mixer fitted with the whisk attachment, whip on medium-high speed until stiff peaks form. Transfer the whipped cream to a piping bag for easier assembly.
Step 3 – Assemble the Xue Mei Niang
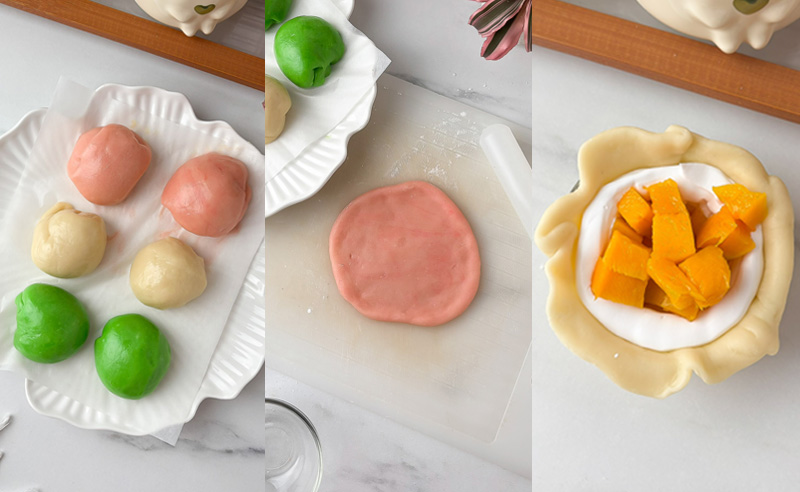
Put on a pair of food-safe gloves, then divide the snow skin dough into 6 equal portions.
Lightly dust one piece of dough with cornstarch, then roll it into a circle slightly larger than your serving bowl. I use a 3½-inch bowl, and I recommend using a plastic rolling pin since it’s less likely to stick.
Gently place the rolled dough into the bowl. Pipe the whipped cream around the edge, then add the fruit in the center. Bring the edges of the dough up and pinch them together tightly to seal.
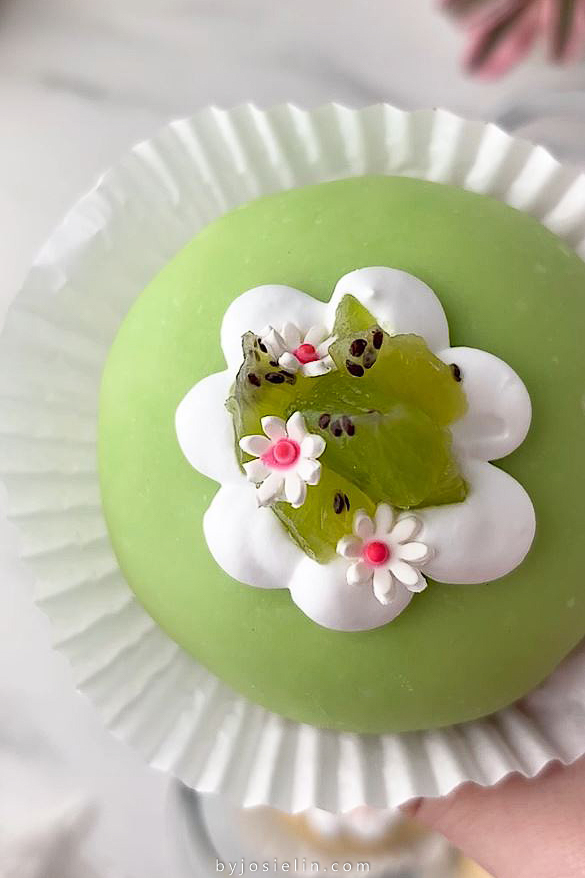
Flip it over so the smooth side is facing up, gently brush off any excess cornstarch, and place it into a paper liner. Finish by decorating the top with a swirl of whipped cream and a few extra pieces of fresh fruit.
Enjoy them right away for the softest, chewiest texture, or store them in an airtight container in the refrigerator for up to 4 days.
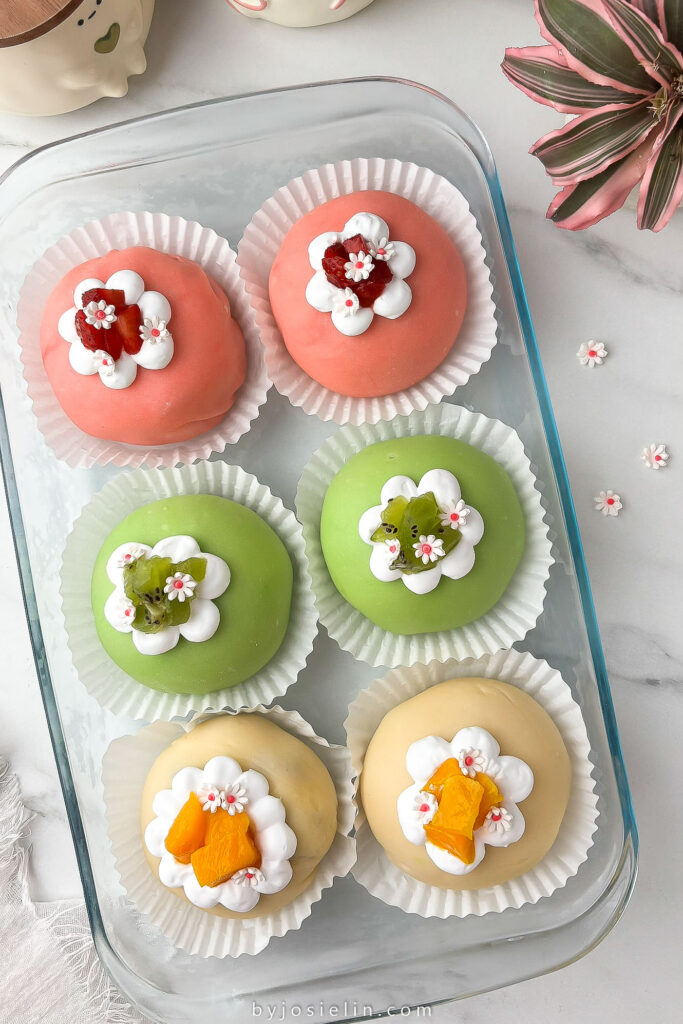
TIPS FOR MAKING THE BEST XUE MEI NIANG
- Wear food safe plastic gloves. The snow skin dough is naturally sticky, so wearing food grade gloves makes kneading and assembling much easier while keeping the dough from sticking to your hands.
- Knead the dough until it’s smooth and stretchy. Don’t worry if the dough feels very sticky at first, that’s completely normal. As you continue kneading, it will become smoother, more elastic, and much easier to work with.
- Dust lightly with cornstarch. A light coating of cornstarch prevents the dough from sticking to your work surface and rolling pin. Use just enough, then gently brush off any excess before serving.
- Keep the whipped cream cold. If the filling starts to soften while you’re assembling, place it back in the refrigerator for a few minutes. Cold whipped cream is much easier to pipe and helps the dessert hold its shape.
- Serve within a few days. Xue Mei Niang are best enjoyed fresh, the same day you make them, but you can store them in an airtight container in the refrigerator for up to 4 days for the best quality.
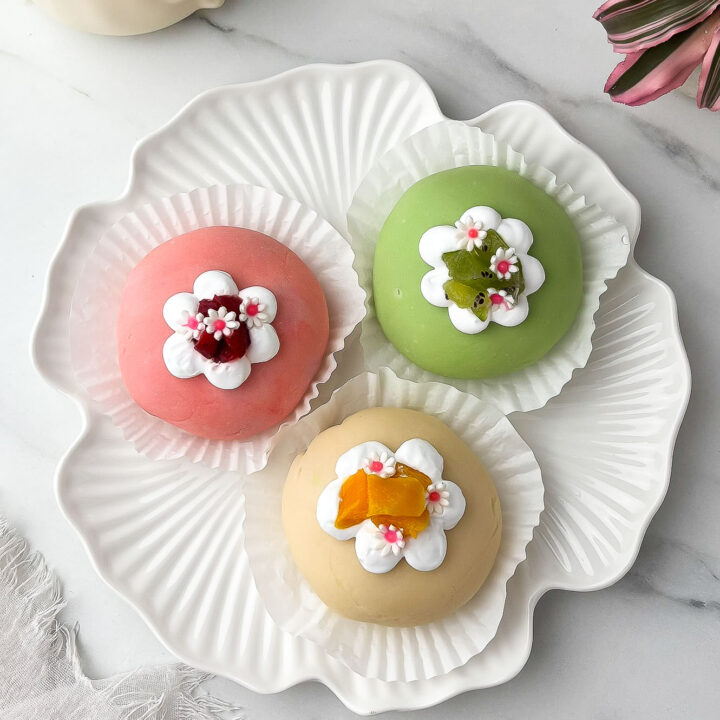
Xue Mei Niang (雪媚娘)
If you love fresh, creamy, and chewy desserts, you have to try these Xue Mei Niang 雪媚娘. They feature a soft and chewy snow skin wrapper filled with fluffy whipped cream and fresh fruit. Sweet, creamy, and refreshing, they're the perfect treat for summer!
Ingredients
Snow Skin:
- 120g (1 cup) glutinous rice flour
- 30g (1/4 cup) cornstarch
- 60g (1/2 cup) powdered sugar
- a little pinch of salt
- 180g (3/4 cup) whole milk
- 1/4 teaspoon vanilla extract
- 20g (1+1/2 tablespoons) unsalted butter
- Gel food coloring, optional
Filling:
- 300g (1+1/4 cups) heavy cream, cold
- 2 tablespoons powdered sugar
- about 2 cups fruits of your choice
Instructions
STEP 1 – Make the Snow Skin
- Fill your steamer with enough water and bring it to a boil over medium heat. Once it's boiling, let the steamer preheat for about 15 minutes.
- Meanwhile, in a medium bowl, whisk together the glutinous rice flour, cornstarch, powdered sugar, and salt.
- In a large measuring cup, combine the milk and vanilla extract.
- Gradually pour the milk mixture into the flour mixture, whisking continuously until you have a smooth batter with no lumps.
- Then, strain the batter through a fine mesh sieve into a heatproof bowl that fits inside your steamer.
- Steam over medium heat for 15 to 20 minutes, or until the dough is fully cooked.
- You'll know it's ready when a butter knife inserted into the center comes out clean and the dough feels firm.
- Carefully remove the bowl from the steamer and let it cool for about 10 minutes.
- Then add the butter and let the residual heat melt it completely.
- Once it's cool enough to touch, put on a pair of food safe gloves and knead the dough until it's smooth, soft, and stretchy. If you'd like to color the dough, knead in a few drops of gel food coloring at this stage.
- Finally, shape the dough into a ball, wrap it tightly in plastic wrap, and let it cool completely.
Step 2 – Prepare the Filling
- Wash and cut your favorite fruit into small cubes, then set aside.
- In a large mixing bowl, combine the cold heavy cream and powdered sugar.
- Using an electric mixer fitted with the whisk attachment, whip on medium-high speed until stiff peaks form.
- Transfer the whipped cream to a piping bag for easier assembly.
Step 3 – Assemble the Xue Mei Niang
- Put on a pair of food-safe gloves, then divide the snow skin dough into 6 equal portions.
- Lightly dust one piece of dough with cornstarch, then roll it into a circle slightly larger than your serving bowl.
- I use a 3½-inch bowl, and I recommend using a plastic rolling pin since it's less likely to stick.
- Gently place the rolled dough into the bowl. Pipe the whipped cream around the edge, then add the fruit in the center. Bring the edges of the dough up and pinch them together tightly to seal.
- Flip it over so the smooth side is facing up, gently brush off any excess cornstarch, and place it into a paper liner. Finish by decorating the top with a swirl of whipped cream and a few extra pieces of fresh fruit.
- Enjoy them right away for the softest, chewiest texture, or store them in an airtight container in the refrigerator for up to 4 days.
Leave a Reply